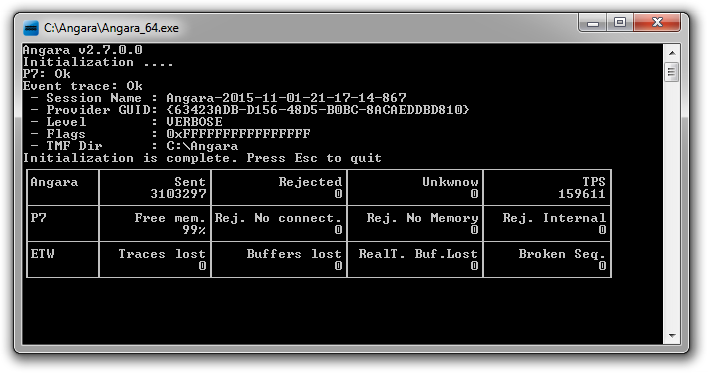
Angara usage is pretty simple and consist of few steps:
- Generate TMF file - this is helper file describes all driver's trace messages, you may generate it using tracepdb.exe utility
- Modify Angara's configuration file - "Angara.xml":
- ETW provider section
- P7 section
- Levels section
- Starting Angara
1. TMF file generation
TMF is a text file which describes all traces of your driver, this file should be generated automatically by post-build procedure of your driver. The command syntax is simple:
tracepdb.exe -o Result.tmf -f MyDriver.pdb
Command consist of next elements:
- "tracepdb.exe" - tool is part of Windows DDK package, usually it is located in "C:\WinDDK\XXXX.XXXXX.X\tools\tracing\i386\tracepdb.exe"
- Key "-o" used to generate single TMF file instead unique TMF file for every driver's source code file
- Key "-f" used to specify your driver's PDB file, this file is generated automatically after every successful build
2. Configuring Angara
The second step is configuring Angara. All configuration parameters are stored inside "Angara.xml" (UTF-16 LE encoding). Configuration file has 3 main sections: ETW provider, P7, levels.
2.1. ETW provider parameters
Inside "Angara.xml" configuration file you can find XML section "Provider". The section is used to specify location of TML files, ETW provider's GUID and some additional parameters.
Section example:
<Provider TMF=""
	  GUID="{63423ADB-D156-48d5-B0BC-8ACAEDDBD810}"
	  Level="5"
	  Flags="0xFFFFFFFFFFFFFFFF"
	  Filter=""
	  Platform="X32"
/>
Parameters:
- TMF - directory where are located generated TMF files. If you change some TMF files while Angara is running you should restart it
- GUID - Event trace session GUID, it is hardcoded for every driver. You can find it inside your driver source code - marco "WPP_DEFINE_CONTROL_GUID"
- Level - You can specify minimum trace level, here is list of values from Evntrace.h:
- 0 - NONE : Tracing is OFF
- 1 - CRITICAL : Abnormal exit or termination
- 2 - ERROR : Severe errors that need logging
- 3 - WARNING : Warnings such as allocation failure
- 4 - INFORMATION: Includes non-error cases (e.g., Entry-Exit)
- 5 - VERBOSE : Detailed traces from intermediate steps
- Flags - Hex bitmask of keywords that determine the category of events that you want the provider to write. The provider writes the event if any of the event's keyword bits match any of the bits set in this mask. 64 bits value max, example Flags="0xFFFFFFFFFFFFFFFF" 64 bits flag available only for Vista, Windows 7 and future OS. For old OS will be used only first 32 bits
- Filter - The provider uses to filter data to prevent events that match the filter criteria from being written to the session. Provider determines the layout of the data and how it applies the filter to the event's data. You should specify you binary filter data in hex mode, for example Filter="0x10BB56CAB2", Angara will deliver this 5 bytes to provider. And your provider should decide how it will use this data for filtering. Angara use custom filter type equal to 0xAB1DE
- Platform : provider platform (X32 or X64), this flag take effect on pointers printing
2.2. P7 parameters
This section is used to specify P7 parameters.
Section example:
<P7Trace Address="localhost"
	 Port="9009"
	 Packet="1472"
	 Name="MyChannel"
	 Sink="Baical"
/>
Parameters:
- Address: Baical's server address (IPv4/IPv6/NetBIOS Name)
- Port: Baical's server port (usually 9009)
- Packet: Minimum transfer unit. We reccomend to use values in range [512..1472] for all network interfaces, except loopback (127.0.0.1, ::1). For loopback you may use up to 65535, it will increase delivery speed.
N.B.:Wrong value can cause delivery problem. Value 512 will work everytime
- Name: trace channel name, max length is 64 characters. You will see this name in Baical server
- Sink: logs direction, there are few options:
- Baical: over network to Baical server directly
- File: to local file
- Auto: to Baical if connection is established, otherwise to file. N.B.: connection timeout is 250 ms.
- Null: all data will be dropped
2.3. Levels parameters
This section usually stays untouched. But if you have modified "levels" defines for your driver somehow like that:
// Define new debug levels
#define     NONE     0 // Tracing is not on
#define     FATAL    1 // Abnormal exit or termination
#define     ERROR    2 // Severe errors that need logging
#define     WARNING  3 // Warnings such as allocation failure
#define     INFO     4 // Includes non-error cases such as Entry-Exit
#define     TRACE    5 // Detailed traces from intermediate steps
#define     LOUD     6 // Detailed trace from every step
You have to update XML section as follows:
<Levels>
    <Trace>
        <WPP Text="LOUD"/>
    </Trace>
    <Debug>
        <WPP Text="TRACE"/>
    </Debug>
    <Info>
        <WPP Text="INFO"/>
    </Info>
    <Warning>
        <WPP Text="WARNING"/>
    </Warning>
    <Error>
        <WPP Text="ERROR"/>
    </Error>
    <Critical>
        <WPP Text="FATAL"/>
    </Critical>
</Levels>
3. Starting Angara
To start Angara you should:
- Generate TMF file
- Update XML configuration file
- Make sure that Baical is running, it is not mandatory, you can run it later
- Make sure that firewall will not block Angara traffic
If all steps are done you can execute command:
Angara_32.exe Angara.xml

